
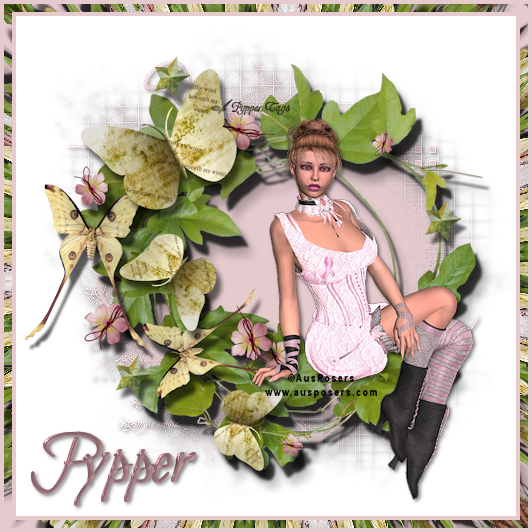
This tutorial is written for those with a working knowledge of PSP. Any resemblance to any other tutorial is purely coincidence.
Supplies needed
1 Tube of choice
(the tube I used is a commissioned tube by AusPosers and is not available for use)
Frame by Raspberry Road Designs (RR_EK_AngelsAmongUsCluster07) found HERE
Mask Nik_022007 found HERE (if this belongs to you please let me know so I can give you credit or remove it)
Open your supplies in PSP.
I use PSPX2 but any version will work.
Resize the frame to 500X500 PIXELS resizing ALL layers.
Add a new layer and flood fill with white.
Move layer below the frame layer.
Add a new raster above the white layer and flood fill with #e5cace.
New Mask Layer from Image.
Choose the Nik_022007 mask and make sure you have Invert checked.
Delete the Mask.
Merge group layer.
Add a drop shadow of choice.
I used 2, 2, 50, 5 color black.
Go to Frame Layer.
Paste the tube of your choice as a new layer
Resize as needed and place tube where you would like (refer to preview) and add the same drop shadow.
Now I added a border to my tag. This is your choice.
Go to Adjust/ Add borders.
Add a symmetrical border of 4 using color #e5cace.
Add a symmetrical border of 8 color white.
Add a symmetrical border of 4 using color #e5cace.
With magic wand select the white border.
Go to Effects, Reflection, Kaleidoscope and use the following settings

Selections select none.
Add all copyright credits!!!!!
Add your name.
And save as a .png or .jpg.
I hope you enjoyed this tut!!!









No comments:
Post a Comment